This is a FREE tutorial on how to make your own homemade nursing cover. I have created this tutorial for your personal use only. I would appreciate comments if these instructions are helpful and if there is anything I can explain better please feel free to email me at courtscovers@gmail.com
Materials Needed:
- 1 yard of material (quilters cotton is the best)
- 15” of boning
- 2 D rings
- Thread
- Measuring tape
- Iron
- 2 Triangular pieces of fabric 9” long (To be used for pocket. I use one out of terry cloth so it can be used as a burp cloth and one out of cotton)
- Cut your pieces out. You need four pieces of material.
- 26” X 40” (this is about how big your nursing cover will be so you can change this measurement to however big you want)
- 4 ½” X 26” (this is your long strap)
- 2 pieces 2 ½” X 13” (this is the strap with the D rings)
- Make your D Ring Strap by taking the two pieces of material. With right side facing sew ¼” seam on both sides.
- Turn this piece right side out.
- Iron flat.
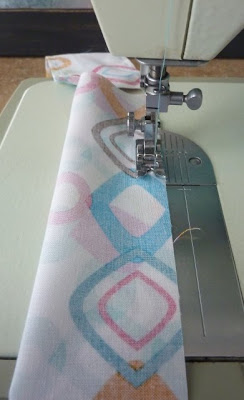
- Sew 1/4” Top stitch on both sides.
- Fold strap in half and put D rings in the middle of the strap. Fold the middle of the material so that it lays flat.
- Sew a zig-zag stitch as close to the D rings as possible. Go back and forth so that it is a thick stitch. (Make sure your needle is on the left side and the stitch spacing is at a 1)
- Finish D Ring Strap
- Fold the long strap Hot Dog style with the right sides facing. Sew a ¼” seam.
- Open the seam and make the seam in the middle. Iron seam flat.
- Sew an arrow at one side of the strap. This will make it so the strap has a point is easier to insert into your D rings.
- Trim material.
- Turn strap right side out. This is easiest to do with a long skinny stick. Make sure you push material out on the point. Iron flat.
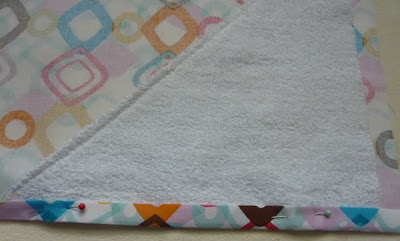
- To make the pocket take a triangular piece of terry cloth (see diagram), back with the same size piece of cotton fabric. Sew the long straight edge together, turn, and top stitch ¼” from seam. This will make the seam lay flat.
Cut a 9” X 9” piece. Cut on dotted line to make two triangles. (Don’t use two layers of terry cloth because it is too thick.)
- Now you should have the following pieces main nursing cover piece, terry cloth triangle, 15” of boning, D ring strap, and long strap
- Pull out the main nursing cover piece and fold three sides over about 1/2”. Iron flat. Fold again about 1/2” and iron flat. This makes a finished edge all the way around the nursing cover. (make sure you do both short sides and one long side)
- Insert Terry cloth triangle into the bottom left edge. You will first pin one side (the short side of the nursing cover) and sew ¼” seam.
- Sew ¼” seam on the other short side of the nursing cover. Fold over the bottom seam of the nursing cover over the terry cloth pocket. Sew ¼” seam.
- Sew a 1” line near the middle of the pocket so that the pocket stays close to the nursing cover and doesn’t fan out.
- The last side of the nursing cover is the last thing Hooray. Fold this seam over about ½” and iron flat. Fold over again about ¾” and iron flat.
- Now we are going to attach the straps. Lay out the nursing cover so that the unfinished side is facing you. Place the long strap on the left side (seam touching nursing cover) and the D ring strap on the right side. Measure where the middle of your nursing cover is. Measure 7” on either side of the middle and that is where the edge of the straps need to be put. Pin the straps into place.
22. Put the boning between the two straps. Make sure it is under the seam and over the straps.
- Sew a ¼” seam. Start on the side with the D ring strap. When you get to about the middle of the D ring strap you are going to sew the seam so it is just on the bottom side of the boning. When you get past the boning you will sew a ¼” seam again. View the pictures for explanation.
About the middle of the strap you should hit the boning. This is when you will sew just to the bottom of the boning so the boning is being sewed into the seam.
- Turn both your straps up and sew the tops of them. This is just a finishing touch that makes the nursing cover look more finished.
- You have finished your nursing cover!! Congrats. Now you wish you purchased one from me don’t you. It is a lot of work but well worth the effort. If you would like me to make a nursing cover for you, email me and I can send you the choices of material I have. Bring me your material and I charge $12 to make your cover and $20 for already made covers.


